Whenever I post about a hike that I’ve done, I want to make sure I provide information so that you can go out and experience the place for yourself. I thought about combining the narrative of whatever story I am trying to tell alongside this guide information, but I didn’t feel like I could do both aspects justice. I know how hard and confusing it can be for beginners to find reliable information on different trails. It is especially hard for beginners who really ARE beginners and might not have the baseline skills, knowledge, or confidence that is assumed by a lot of blogs and resources. So I will be putting together a separate detailed, step-by-step guide for all of my hikes!
Location: Devil’s Lake State Park (S5975 Park Rd, Baraboo, WI 53913)
Devil’s Lake State Park features 500-foot quartzite bluffs overlooking a 360-acre lake. It is the most popular of Wisconsin’s 48 State Parks and for VERY good reason! You’ll find tons of amazing hiking trails and lots of other outdoor recreation opportunities and camping options. Below, I will outline my favorite hike that I recommend. If you only have one day, this hike will give you the most scenic highlights of the park.
Maps:


This is a zoomed in map of the ~5 mile Lake Loop that I like do that combines several smaller trails (East Bluff Trail, either Balanced Rock OR Potholes, and the West Bluff Trail).
Step by Step Guide to Hiking the Lake Loop
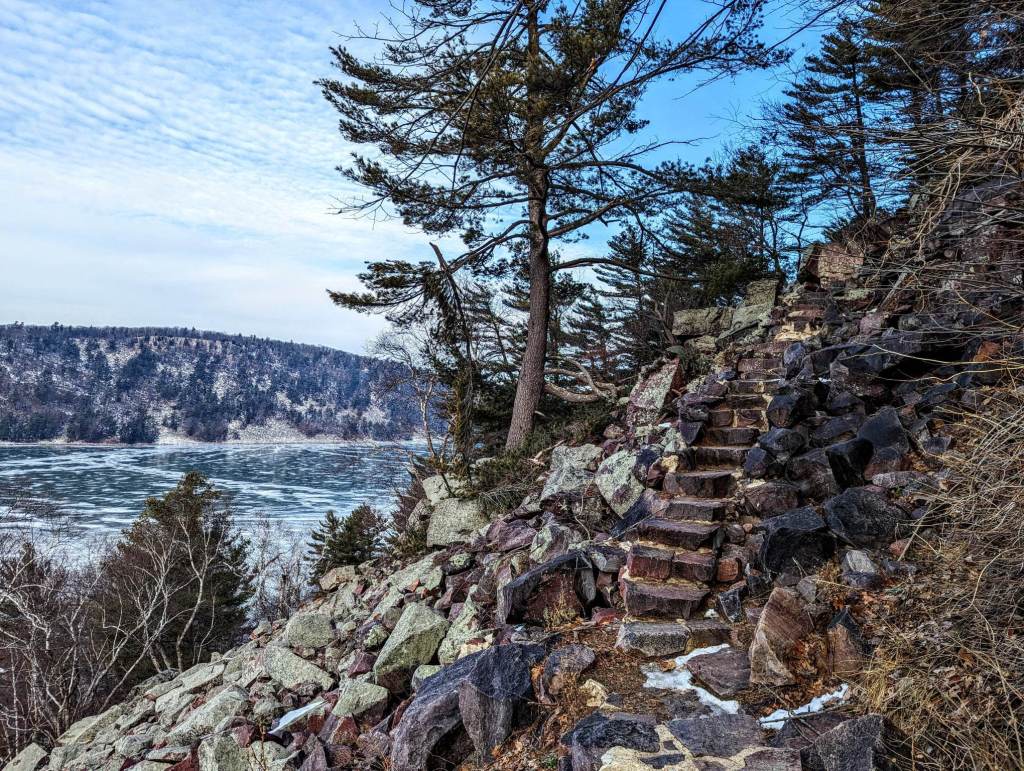
First, find parking. I think the best parking area for this hike is on the South Shore near the concessions (red star on map). Second best is at the North Shore by the trailhead to East Bluff (blue star). I prefer the south lot because it allows you to hike the loop counter clockwise, which feels best for many reasons. The south end of the East Bluff is the steepest most difficult part of the entire hike. Plus, you are walking up steps carved from the rocks that are pretty much always slick if there is any hint of rain or snow. I find it is best to start fresh! Get that hard climb out of the way! Fall risk is less when you are going up the steep steps and if you have any knee issues, I definitely recommend going up that staircase rather than down. Here are a few pics of what you will be facing in different conditions.
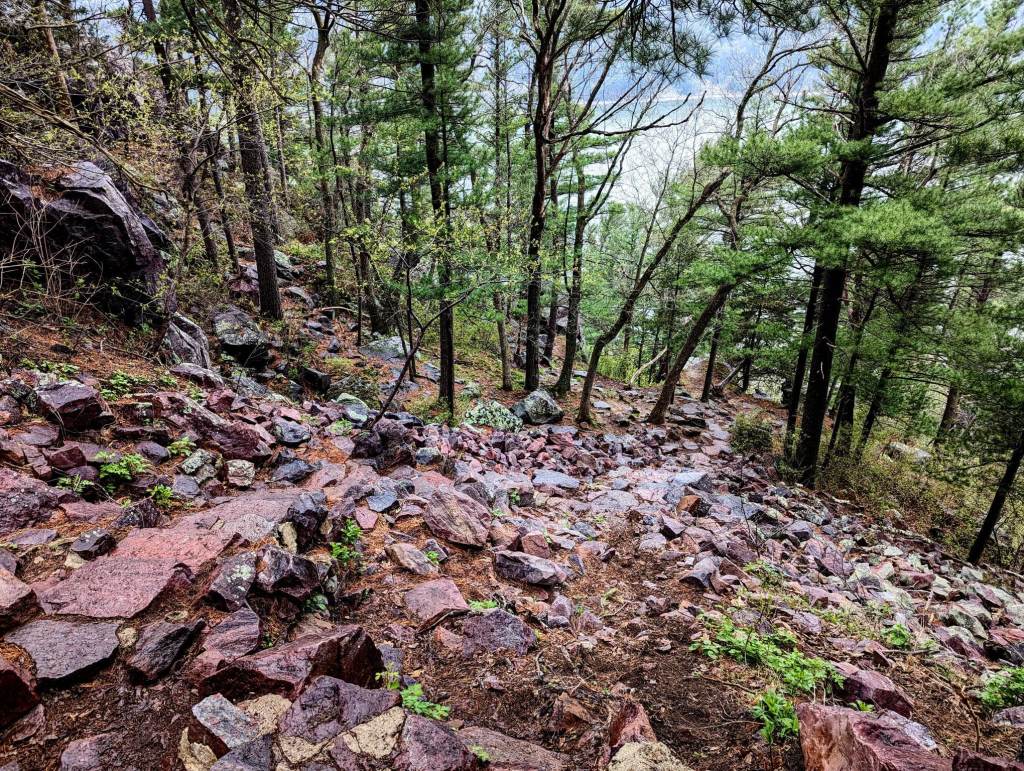
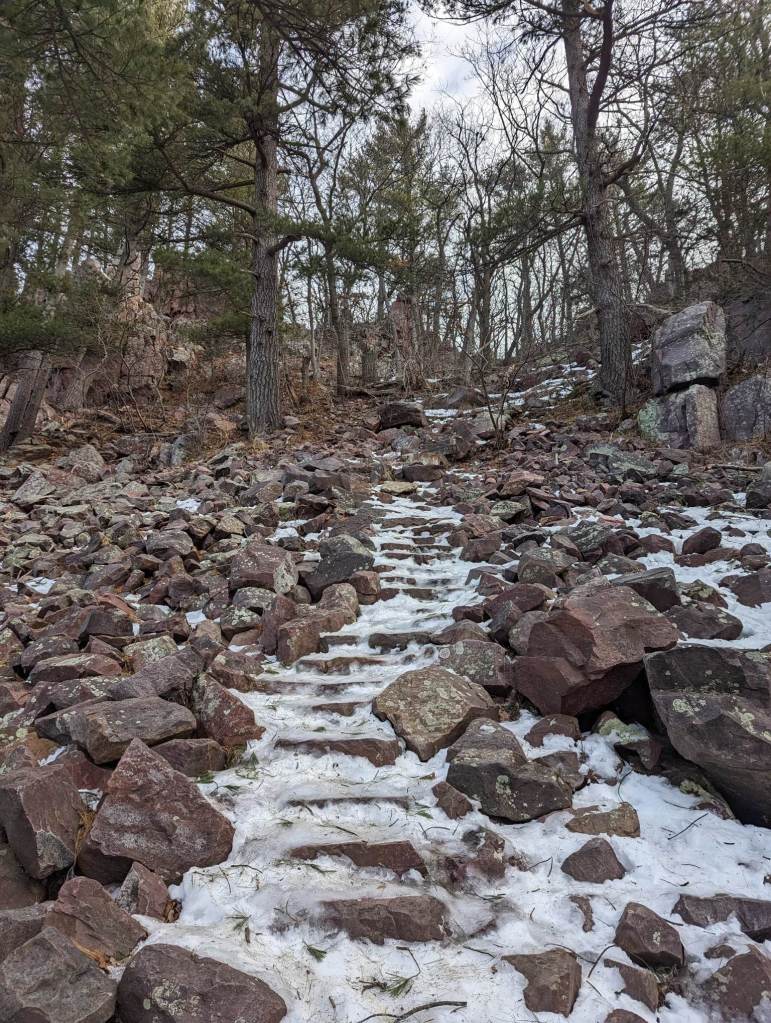

Take it slow! In winter, I definitely bring along my YakTrax over your boots and bring trekking poles!
When you head up this bluff, there are several iconic sights that you will see images of all over social media or in Google searches of this park. It is hard to see all of them in one hike though. You would have to backtrack in order to see both the Potholes AND Balanced Rock, so I usually do one or the other. On the map above, I have the Potholes Trail route. Here’s what these different formations looks like and some details about how to see them!
Balanced Rock
This formation is right off the main trail, but is easy to miss because we’re all looking at our feet! If you are headed up the bluff, it will be off to your right about halfway up. There are some wooden signs on the trail that will point you to it. It is just past the big vertical rock face that you will often see rock climbers on. This rock is taller than a person and you can climb up right next to it.
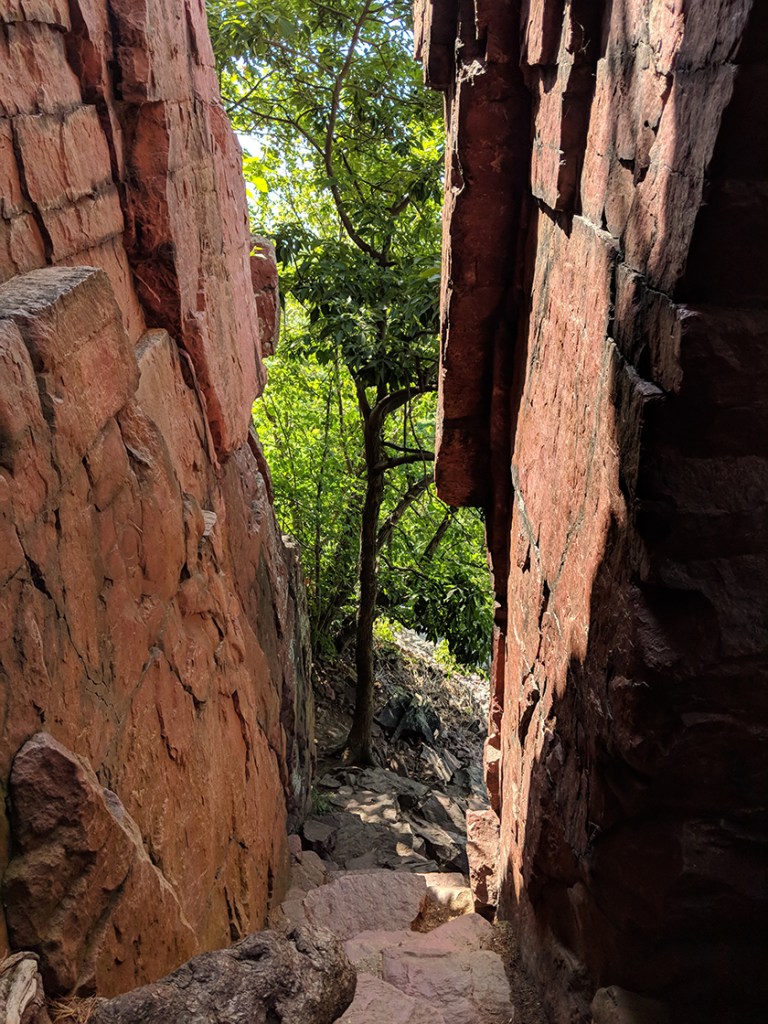
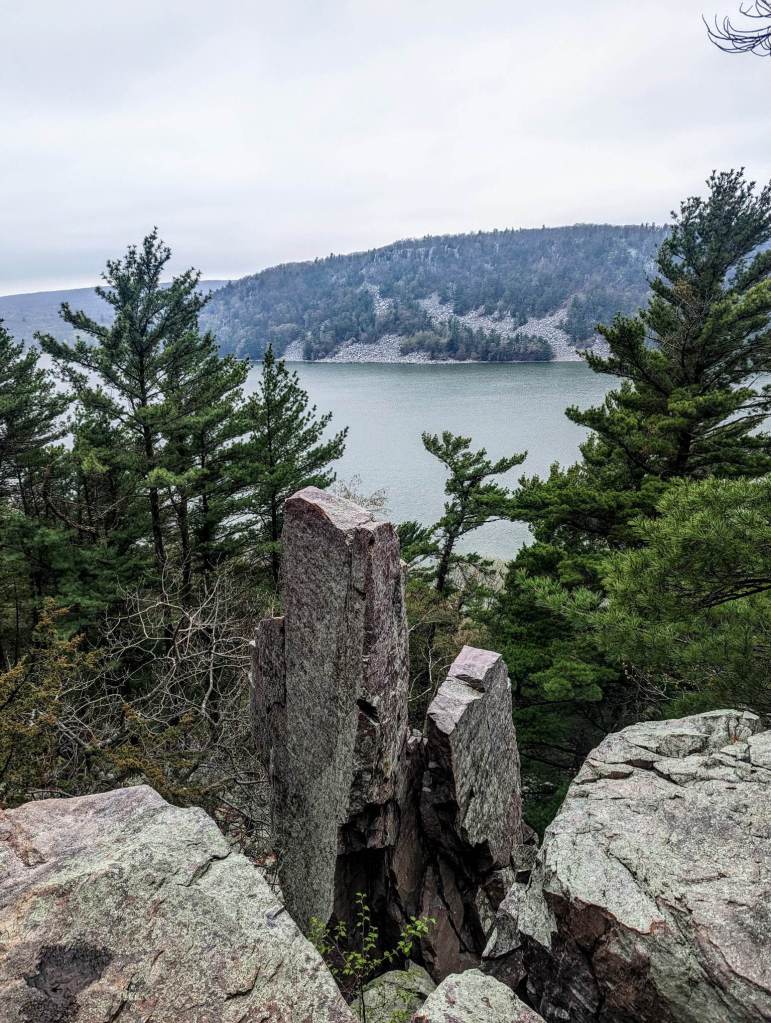
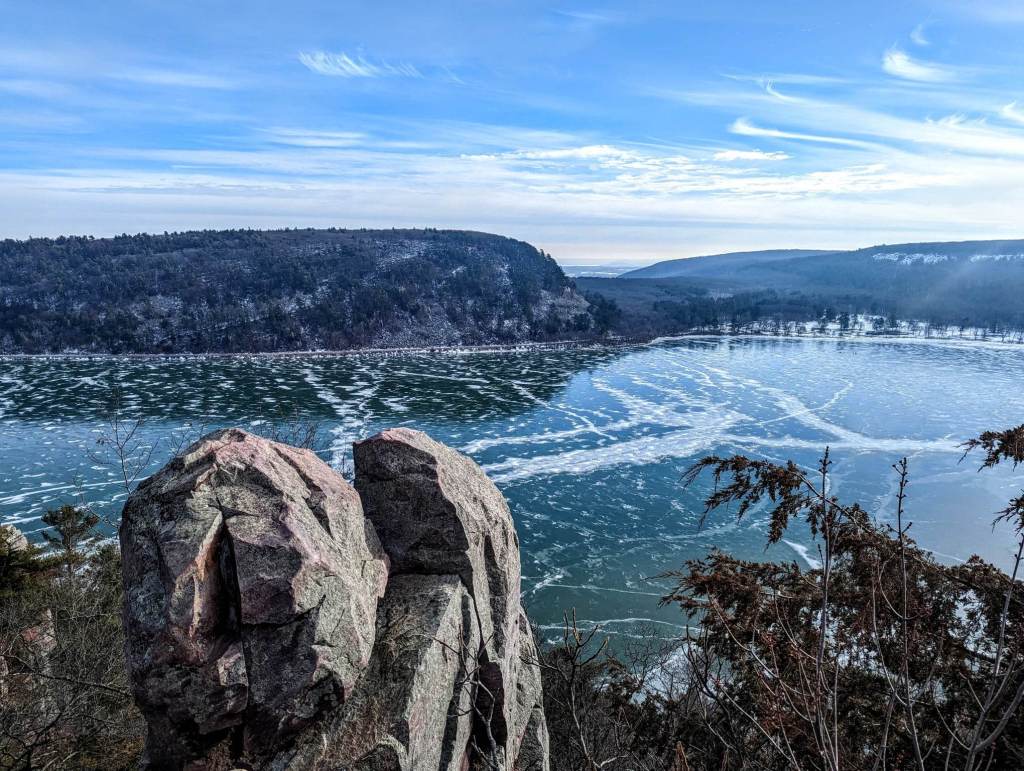
Unnamed (Devil’s Hallway?!)
This one doesn’t have an official name, and I think it is a missed opportunity! If you head up the bluff via the Potholes trail, you will end up passing in-between these two vertical rock formations. It’s super cool!
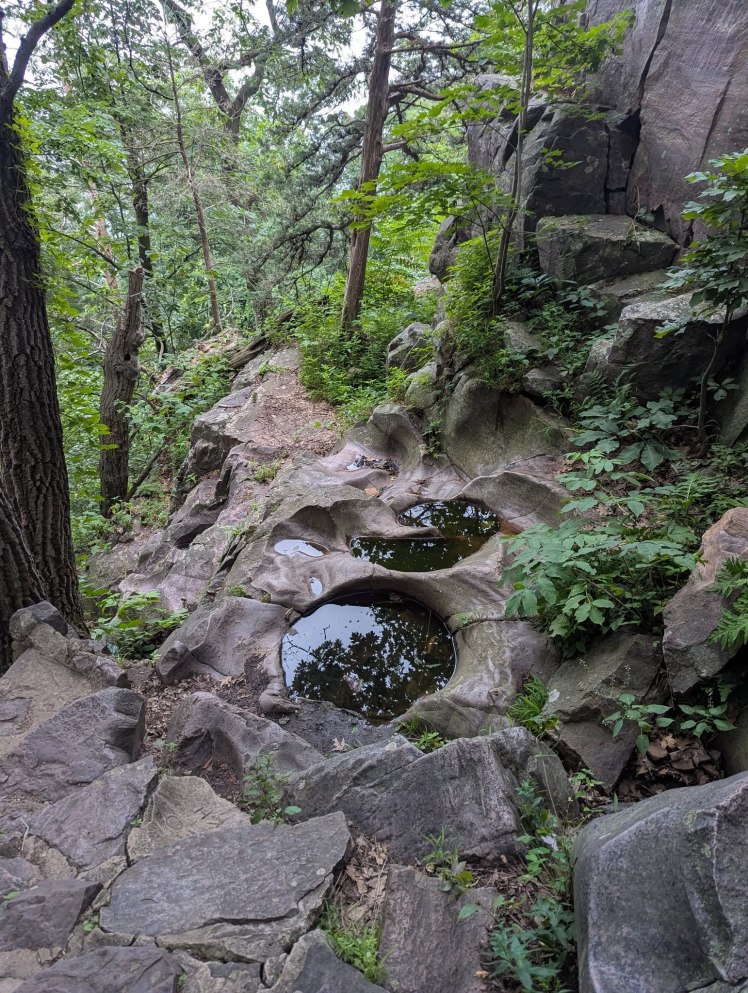
Potholes
Below are the potholes that this trail is named after. These rock formations formed by swirling water from the glaciers that covered this area. These are near the top of the trail

Devil’s Doorway
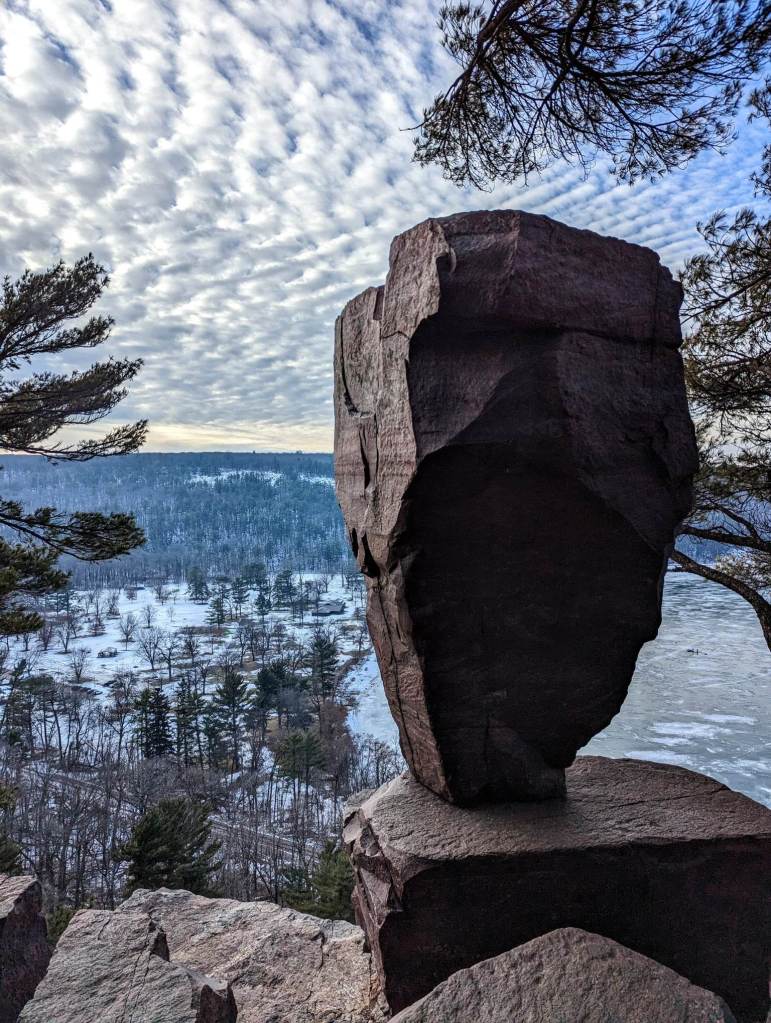
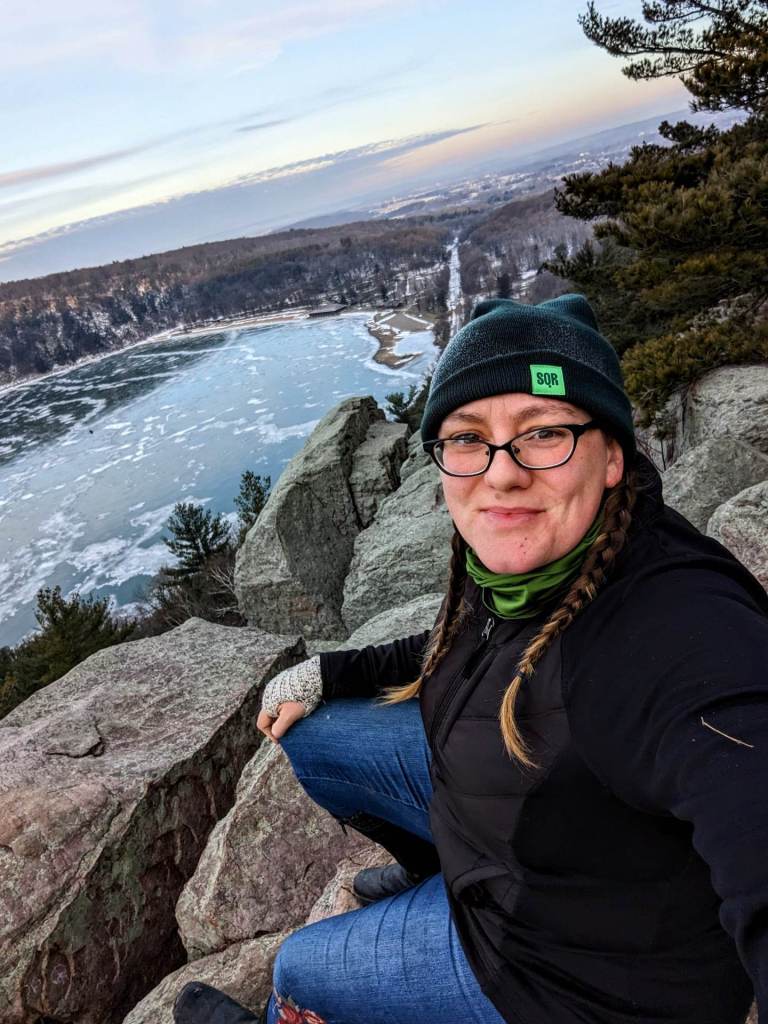
You can access the Doorway from a small loop trail at the top of the bluff. If you came up the Potholes Trail, you’ll take a left at the top on the East Bluff Trail. If you came up via the Balanced Rock Trail, you’ll take a right at the top instead. The loop is clearly marked and takes you down a short section of stairs to this formation. There’s lots of room to get different angle shots of the formation and, if you are brave enough, you can climb up into the doorway. Although, I do not recommend that! It’s definitely a little sketchy! Be sure to look around behind you too, especially at sunrise, as there are cool formations and views everywhere here!
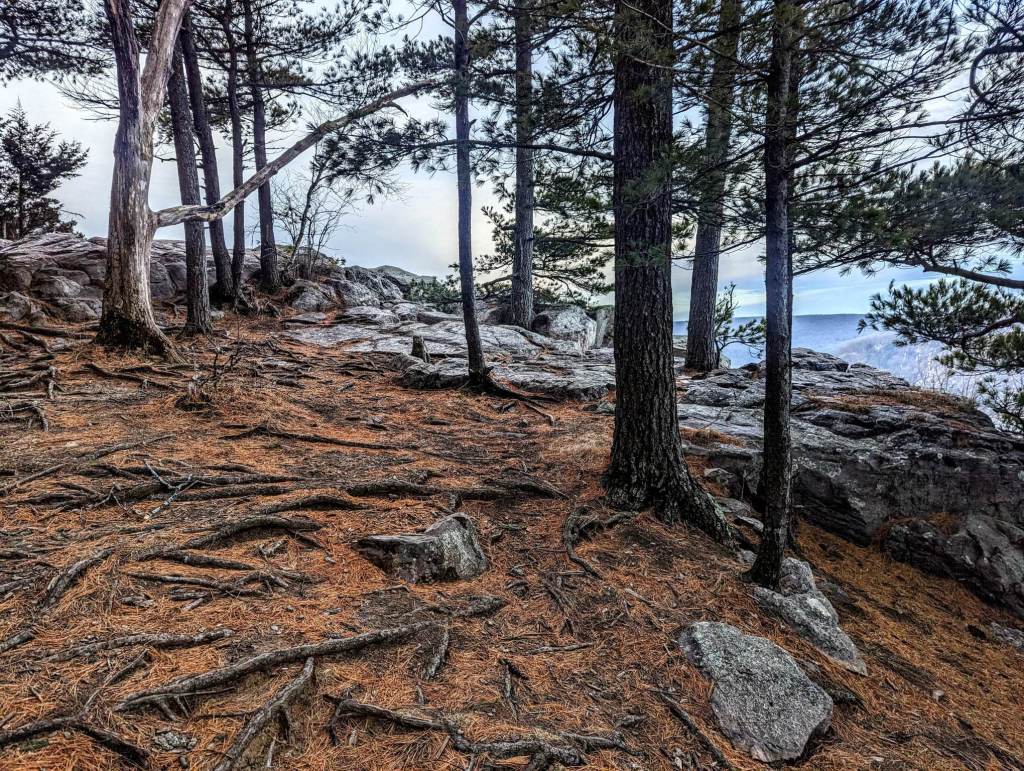
Heading north across the bluff, you should definitely take the East Bluff Trail, not the East Bluff Woods Trail. The woods trail does as it suggests…goes through the woods. But the Bluff Trail is what gives you the amazing views of the lake with various rock formations that you can climb around on. There are so many spectacular spots to explore along this stretch! The trail here is super obvious, so feel free to wander around all the different view points. The only way you can go is either back the way you came or further north towards the downhill section on the north side of the bluff.
From here, you’ll make your way down the bluff towards the North Shore of the lake. You can stop to hit up some bathrooms or grab a snack or cold drink at the concession stand if it is open. Or hang out by the water. You’ll be walking along the lake towards the West Bluff. It is usually most crowded at the shore where you first come down, as the swimming beach is here. But just over on the far side is a nice spot without a sandy beach where you can get some good shoreline photos! This is just in front of the bathrooms by the Tumbled Rocks Trail.
To continue up the West Bluff Trail, you’ll take a right behind these bathrooms and head up a small hill until you see the sign for the West Bluff to your right. Now you are headed uphill again! This section is not nearly as intimidating, however. There are a few stairs but mostly just some slope with random rocks and roots. When you get to the top of the bluff, you’ll once again start to come across some great rock formations and views! Most of these are towards the far end of the bluff, so keep walking! While there aren’t quite as many view points over here, I usually find that this side is quieter. Most people only hike one of the bluffs and they choose to go see the major rock formations on the other bluff that I outlined above. So this is a great spot to kick back and relax.
You are now in the home stretch! You are going to come down the West Bluff Trail towards the road at the bottom. Again, there is only one trail up here and it is very well marked. You can’t get lost unless you wander off into the woods. The slope here is about the same as the last slope you came down. A few more stairs and more rocks and roots. But I definitely recommend making THIS your final slope! Don’t start at your car where we parked on the South Shore and head this way first, or you’ll be coming down the MAJOR set of stairs on the East Bluff. You’ll be tired by then and far more likely to take a nasty spill. Do yourself a favor and do the lake loop COUNTER CLOCKWISE!
Once you hit the road, it is smooth sailing from here! You will walk along the pavement and sidewalk around the south shore of the lake. There will be people fishing scattered about and you get really good views of the bluffs that you just conquered! GO YOU! There’s also a cute little boardwalk that ends right at the South Shore Concessions area, so you can get another ice cream. I won’t judge.
Park Amenities
There are a TON of amenities at this park, so it is impossible to name them all! Here’s a highlights list:
- Three Campgrounds: Ice Age Campground, Northern Lights Campground, and Quartzite. All together there are 423 sites at Devil’s Lake with a mixture of group and individual sites as well as electric and non-electric and sites for tents and RVs. You can find specific information about each campground and make reservations here. Do note though that Devil’s Lake is one of, if not the most, popular parks in the state. Campground reservations sell out insanely quickly. So book early or consider camping outside of the park itself.
- Concession Stands: There are two stands, one on the north and one on the south shore of the lake that are open spring through fall. You can buy some food and groceries, camp items, ice, firewood, and souvenirs. I always recommend not relying on these stores though. They are great to grab a cold drink or some ice cream on a hot day after a grueling hike, or to pick up a random item that you may have forgotten to pack, like a toothbrush. But things are a little pricey in these stores and you are better off buying items elsewhere.
- Rentals: during the summer you can rent kayaks, paddleboards, and paddleboats and in the winter there are snowshoe rentals!
- Picnic Areas & Shelters: there are tons of picnic areas here. The two big ones are at the concession stands at the north and south ends of the lake. But there are other smaller areas around, check the maps! Some of them are reservable here if you have a big group.
- Nature Center: located at the north entrance, it is open Mon-Sat 10am-4pm and offers some indoor educational exhibits as well as a kids exploration room. This is where you rent snowshoes! And throughout the year they offer free educational and recreational programs.
- Hiking Trails: obviously. There are over 30 miles of trail here, ranging from some advanced steep climbs up bluffs, strolls through meadows, and rolling forested hills. Check out the trail info here!
- Other Recreational Activities: fishing, rock climbing, hunting, biking, and swimming all happen at Devil’s Lake. Read up on those activities here.
Fees
It is important to know that State Parks in Wisconsin do have fees to enter via vehicle. You can pay for any passes at the entrance station. There will either be a person staffing it whom you can purchase from, or there are self-pay envelopes.
I HIGHLY recommend buying yourself an Annual Vehicle Admission Sticker! These are $28 for WI license plates, $38 for out of state. Given that a day pass costs $8 in-state/$11 out-of-state, it makes way more sense to get an annual pass if you will be visiting multiple parks throughout the year. You can easily buy these online here and read up on all the rules, potential discount prices available, and how to replace a sticker if needed.
Discover more from An Ordinary Odyssey
Subscribe to get the latest posts sent to your email.
